文章中的代码我都放在了github上,有需要的可以自取 。记得点个star。
基础题目 Shell编程 编写shell脚本,该脚本接收两个参数,参数1作为要读写的文件,参数2作为标志位,标识是读还是写。功能完成对参数1所示文件的读写,该文件的内容为 “自己学号的后3位 MYFILE”。
这个比较简单,稍微了解一下shell编程和常用命令就能写出来,不多赘述。
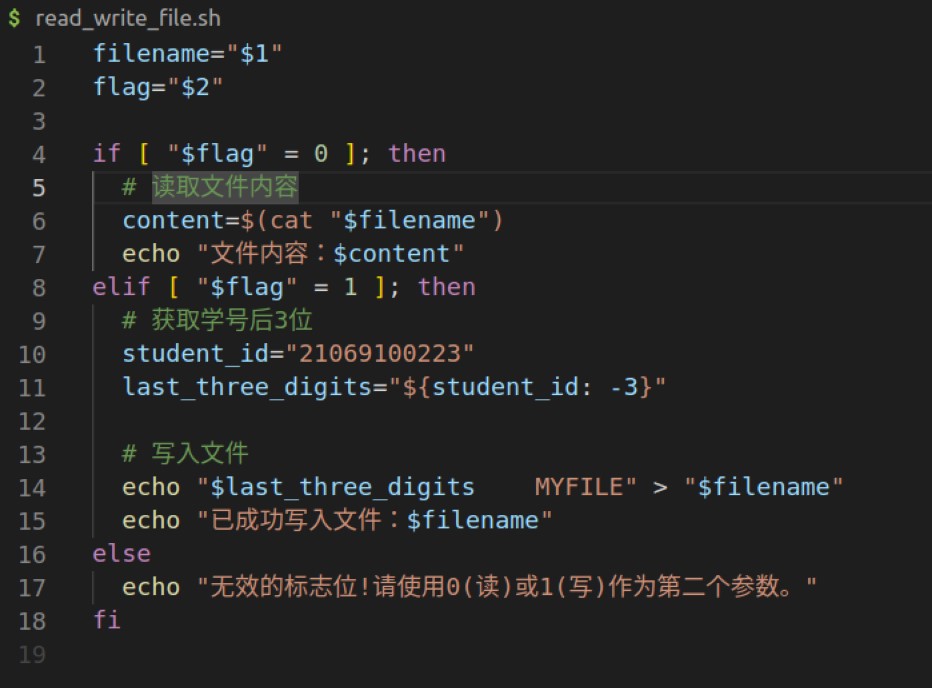
1 2 3 4 5 6 7 8 9 10 11 12 13 14 15 16 17 18 19 filename="$1 " flag="$2 " if [ "$flag " = 0 ]; then content=$(cat "$filename " ) echo "文件内容:$content " elif [ "$flag " = 1 ]; then student_id="21069100223" last_three_digits="${student_id: -3} " echo "$last_three_digits MYFILE" > "$filename " echo "已成功写入文件:$filename " else echo "无效的标志位!请使用0(读)或1(写)作为第二个参数。" fi
保存文件,在Terminal中执行
1
2
sudo chmod -x read_write.sh # 给予可执行权限 ./read_write_file.sh "test.txt" 1
系统调用编程 使用系统调用open read write,完成一个C语言程序:该程序接收两个参数,参数1作为要读写的文件,参数2作为标志位,标识是读还是写。功能完成对参数1所示文件的读写,该文件的内容为 “学号 MYFILE”,其中学号填为自己的学号。改造上面的程序,使用semaphore,并利用该程序生成2个进程,这两个进程写同一个文件,要求:a.互斥写,即只有一个进程写完后,才能让另一个进程写; b. 一个进程写入内容:“自己学号的后3位PROC1 MYFILE1”;另一个进程写入内容:“自己学号的后3位PROC2 MYFILE2”
1 2 3 4 5 6 7 8 9 10 11 12 13 14 15 16 17 18 19 20 21 22 23 24 25 26 27 28 29 30 31 32 33 34 35 36 37 38 39 40 41 42 43 44 45 46 47 48 49 50 51 52 53 54 55 56 57 58 59 60 61 62 63 64 65 66 67 68 69 70 #include <stdio.h> #include <string.h> #include <pthread.h> #include <semaphore.h> #include <syscall.h> #include <fcntl.h> #include <unistd.h> #define MAX_SIZE 1024 sem_t semaphore;int fd; void * print1 (void * arg) { sem_wait(&semaphore); char * content = "223PROC1 MYFILE1\n" ; for (int i = 0 ; i < 19 ; i++) { write(fd, content + i, 1 ); } sem_post(&semaphore); } void * print2 (void * arg) { sem_wait(&semaphore); char * content = "223PROC2 MYFILE1\n" ; for (int i = 0 ; i < 19 ; i++) { write(fd, content + i, 1 ); } sem_post(&semaphore); } int main (int argc, char * argv[]) { if (argc != 3 ) { printf ("usage: <filename> <flag>\n" ); exit (1 ); } if ((fd = open(argv[1 ], O_WRONLY | O_APPEND)) == -1 ) { fprintf (stderr , "fail to open %s\n" , argv[1 ]); exit (2 ); } if (strcmp (argv[2 ], "0" ) == 0 ) { char buf[MAX_SIZE]; read(fd, buf, MAX_SIZE - 1 ); printf ("%s" , buf); } else if (strcmp (argv[2 ], "1" ) == 0 ) { sem_init(&semaphore, 0 , 1 ); pid_t pid = fork(); if (pid == 0 ) { print2(NULL ); } else { print1(NULL ); } sem_destroy(&semaphore); } else { fprintf (stderr , "usage: 0:read, 1:write.\n" ); } close(fd); exit (0 ); }
编译文件的命令:
1 gcc read_write.c -o read_write -pthread
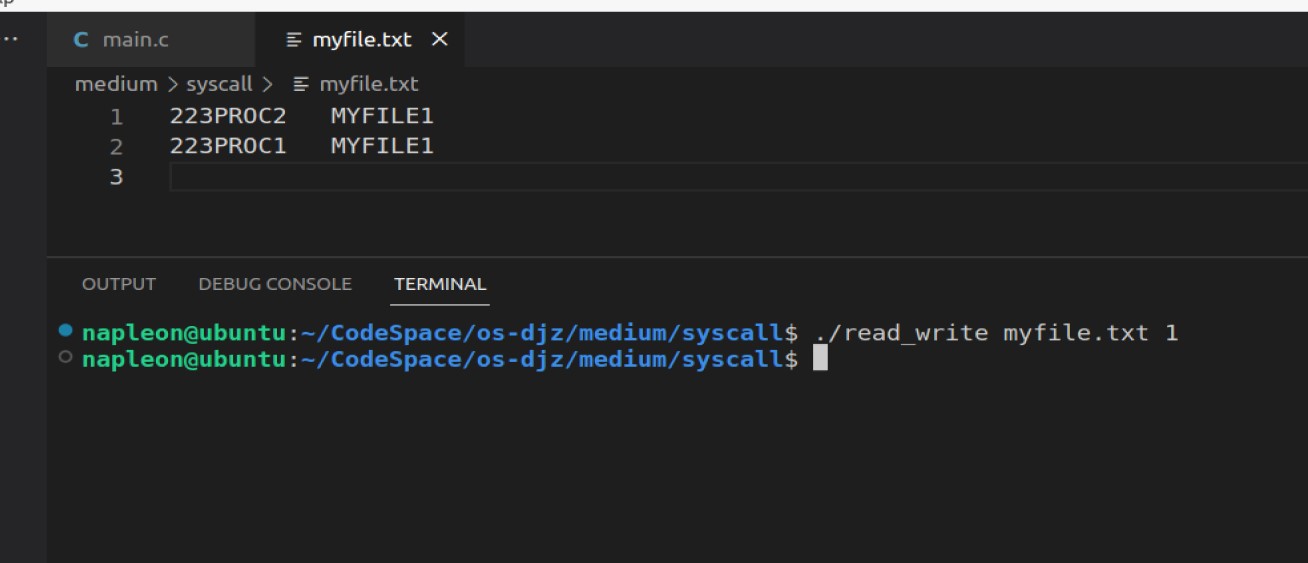
运行结果如下:
内核编程 添加一个系统调用, 该系统调用接受两个参数:参数1:以整型数表示的自己学号的后3位;参数2:flag,取值为0或1,若为0,该系统调用的返回值为参数1的个位。若为1。该系统调用的返回值为参数1的十位。
我用的版本是Ubuntu 20.04。源是阿里源。
本文参考https://moefactory.com/3041.moe
编译内核 添加系统调用 官网地址: https://www.kernel.org/ 。本文写作时最新的稳定版为6.2.11。
安装依赖:
1 sudo apt install gcc make libncurses5-dev openssl libssl-dev build-essential pkg-config libc6-dev bison flex libelf-dev
系统调用os_exp,添加在kernel/sys.c中。
1
2
3
4
SYSCALL_DEFINE1(os_exp, long long , id) { long long mod = (id % 2 == 0 ) ? 1000000 : 100000 ; return id % mod; }
在include/linux/syscalls.h中添加系统调用的函数声明:
1 asmlinkage long sys_os_exp (long long id) ;
最后在系统调用表中添加我们自定义的系统调用。arch/x86/entry/syscalls/syscall_64.tbl中,在335号系统调用后添加:
1 335 common os_exp __x64_sys_os_exp
<系统调用编号> common <系统调用名称> <系统调用的函数名称>,这四列之间请使用制表符分隔。注意系统调用的函数名称是有格式要求的,格式为 __x64_sys_<函数名>,而这里的函数名就是之前我们自己拟定的 os_exp。
配置内核代码 在下载下来的内核目录下,执行:
1 cp -v /boot/config-$(uname -r) .config
目的是为了使我们编译的内核的配置与当前环境的配置一致。
修改.config文件
编译安装内核 编译 编译命令:
分配线程的数目取决于虚拟机的CPU核数以及每个核的线程数,比如我的虚拟机是双核双线程的,因此选择4线程编译。
安装 安装内核模块命令:
1 sudo make modules_install
安装内核:
重启系统并查看新内核:
测试系统调用 驱动编程 完善1.7节设备驱动例子中的字符设备程序,使之满足以下功能:
i.安装设备后从设备中读出字符串为自己学号的后3位;
ii. 设备支持每次写入字符不超过1024个,超过部分被丢弃,并且能够保存最近一次修改前的rwbuf里的内容。
iii. 设备支持系统调用ioctl(int d, int req,…),共支持设置三种模式:a. 清除设备中写入的字符串; b. 从设备中读时,读出的是最近一次修改前的内容。 c. 从设备中读时,读出的是最新内容
iv. 设备关闭前不能被多次打开;
v. 自己编写测试程序,验证以上功能
此处参考了小梦学长的 博客 。为了实现读最新内容和读最近一次修改前的内容两种模式,我设置了两个缓冲区。一个存储最新的信息,另一个在更新信息时保存new_buf的信息,以实现保存最近一次修改前的内容。具体细节参见代码。
1 2 3 4 5 6 7 8 9 10 11 12 13 14 15 16 17 18 19 20 21 22 23 24 25 26 27 28 29 30 31 32 33 34 35 36 37 38 39 40 41 42 43 44 45 46 47 48 49 50 51 52 53 54 55 56 57 58 59 60 61 62 63 64 65 66 67 68 69 70 71 72 73 74 75 76 77 78 79 80 81 82 83 84 85 86 87 88 89 90 91 92 93 94 95 96 97 98 99 100 101 102 103 104 105 106 107 108 109 110 111 112 113 114 115 116 117 118 119 120 121 122 123 124 125 126 127 128 129 130 131 132 133 134 135 136 137 138 139 140 141 142 143 144 145 146 147 148 149 150 151 152 153 154 155 #include <linux/module.h> #include <linux/kernel.h> #include <linux/fs.h> #include <linux/uaccess.h> #define RW_CLEAR 0x909090 #define RW_RDOLD 0x909091 #define RW_RDNEW 0x909092 #define DEVICE_NAME "rwbuf" static int inuse = 0 ;#define RWBUF_MAX_SIZE 1024 static int mode = 1 ;static char rwbuf_old[RWBUF_MAX_SIZE] = "223" ;static int old_cnt = 3 ;static char rwbuf_new[RWBUF_MAX_SIZE] = "223" ;static int new_cnt = 3 ;int rwbuf_open (struct inode *inode, struct file *file) { if (inuse == 0 ) { inuse = 1 ; try_module_get(THIS_MODULE); return 0 ; } else return -1 ; } int rwbuf_release (struct inode *inode, struct file *file) { inuse = 0 ; module_put(THIS_MODULE); return 0 ; } ssize_t rwbuf_write (struct file *file, const char *buf, size_t count, loff_t *f_pos) { if (count > 0 ) { strcpy (rwbuf_old, rwbuf_new); old_cnt = new_cnt; new_cnt = count > RWBUF_MAX_SIZE ? RWBUF_MAX_SIZE : count; copy_from_user(rwbuf_new, buf, new_cnt); printk("[rwbuf] Write successful. After writing, new_cnt = %d\n" , new_cnt); return new_cnt; } else { printk("[rwbuf] Write failed. Length of string to be written = %lu\n" , count); return -1 ; } } ssize_t rwbuf_read (struct file *file, char *buf, size_t count, loff_t *f_pos) { if (mode == 1 ) { copy_to_user(buf, rwbuf_new, count); } else { copy_to_user(buf, rwbuf_old, count); } return count; } long rwbuf_ioctl (struct file *file, unsigned int cmd, unsigned long arg) { printk("[rwbuf] [RW_CLEAR:%x],[cmd:%x]\n" , RW_CLEAR, cmd); if (cmd == RW_CLEAR) { new_cnt = 0 ; printk("[rwbuf] Do ioctl successful. After doing ioctl, new_cnt = %d\n" , new_cnt); } else if (cmd == RW_RDNEW) { mode = 1 ; } else if (cmd == RW_RDOLD) { mode = 0 ; } else { printk("[rwbuf] Do ioctl failed. new_cnt = %d\n" , new_cnt); return -1 ; } return 0 ; } static struct file_operations rwbuf_fops = { open : rwbuf_open, release : rwbuf_release, read : rwbuf_read, write : rwbuf_write, unlocked_ioctl : rwbuf_ioctl }; static int __init rwbuf_init (void ) { int ret = -1 ; printk("[rwbuf] Initializing device...\n" ); ret = register_chrdev(60 , DEVICE_NAME, &rwbuf_fops); if (ret != -1 ) printk("[rwbuf] Initialize successful\n" ); else printk("[rwbuf] Initialize failed\n" ); return ret; } static void __exit rwbuf_exit (void ) { unregister_chrdev(60 , DEVICE_NAME); printk("[rwbuf] Uninstall successful\n" ); } module_init(rwbuf_init); module_exit(rwbuf_exit); MODULE_LICENSE("GPL" );
设备的Makefile如下:
1 2 3 4 5 6 7 8 9 10 11 12 13 14 15 16 17 CC := gcc KERNEL_DIR := /lib/modules/$(shell uname -r) /build MODULE_NAME := rwbuf MODULE_SRC := rwbuf.c obj-m := $(MODULE_NAME) .o all: $(MAKE) -C $(KERNEL_DIR) M=$(PWD) modules clean: $(MAKE) -C $(KERNEL_DIR) M=$(PWD) clean
测试前需要安装设备,在terminal中依次键入以下命令:
1 2 3 sudo mknod /dev/rwbuf c 60 0 sudo chmod 777 /dev/rwbuf sudo insmod rwbuf.ko
测试程序:
1 2 3 4 5 6 7 8 9 10 11 12 13 14 15 16 17 18 19 20 21 22 23 24 25 26 27 28 29 30 31 32 33 34 35 36 37 38 39 40 41 42 43 44 45 46 47 48 49 50 51 52 53 54 55 56 57 58 59 60 61 62 63 64 65 66 67 68 69 70 #include <stdio.h> #include <fcntl.h> #include <unistd.h> #include <sys/ioctl.h> #define DEVICE_NAME "/dev/rwbuf" #define RW_CLEAR 0x909090 #define RW_RDOLD 0x909091 #define RW_RDNEW 0x909092 int main () { int fd; int ret; char buf[1024 ]; fd = open(DEVICE_NAME, O_RDWR); if (fd == -1 ) { printf ("Open device error" ); return 0 ; } printf ("\nRead student id..." ); if (read(fd, buf, 3 ) > 0 ) { buf[3 ] = '\0' ; printf ("%s\n" , buf); } else { printf ("%s\n" , buf); } printf ("read old_buf. Then write aaaaa into buf.\n" ); write(fd, "aaaaa" , 5 ); ioctl(fd, RW_RDOLD); if (read(fd, buf, 3 ) > 0 ) { printf ("Old Buffer:%s\n" , buf); } ioctl(fd, RW_RDNEW); if (read(fd, buf, 5 ) > 0 ) { printf ("New Buffer:%s\n" , buf); } printf ("Write 1100 'a'..." ); if (write(fd, "aaaaaaaaaaaaaaaaaaaaaaaaaaaaaaaaaaaaaaaaaaaaaaaaaaaaaaaaaaaaaaaaaaaaaaaaaaaaaaaaaaaaaaaaaaaaaaaaaaaaaaaaaaaaaaaaaaaaaaaaaaaaaaaaaaaaaaaaaaaaaaaaaaaaaaaaaaaaaaaaaaaaaaaaaaaaaaaaaaaaaaaaaaaaaaaaaaaaaaaaaaaaaaaaaaaaaaaaaaaaaaaaaaaaaaaaaaaaaaaaaaaaaaaaaaaaaaaaaaaaaaaaaaaaaaaaaaaaaaaaaaaaaaaaaaaaaaaaaaaaaaaaaaaaaaaaaaaaaaaaaaaaaaaaaaaaaaaaaaaaaaaaaaaaaaaaaaaaaaaaaaaaaaaaaaaaaaaaaaaaaaaaaaaaaaaaaaaaaaaaaaaaaaaaaaaaaaaaaaaaaaaaaaaaaaaaaaaaaaaaaaaaaaaaaaaaaaaaaaaaaaaaaaaaaaaaaaaaaaaaaaaaaaaaaaaaaaaaaaaaaaaaaaaaaaaaaaaaaaaaaaaaaaaaaaaaaaaaaaaaaaaaaaaaaaaaaaaaaaaaaaaaaaaaaaaaaaaaaaaaaaaaaaaaaaaaaaaaaaaaaaaaaaaaaaaaaaaaaaaaaaaaaaaaaaaaaaaaaaaaaaaaaaaaaaaaaaaaaaaaaaaaaaaaaaaaaaaaaaaaaaaaaaaaaaaaaaaaaaaaaaaaaaaaaaaaaaaaaaaaaaaaaaaaaaaaaaaaaaaaaaaaaaaaaaaaaaaaaaaaaaaaaaaaaaaaaaaaaaaaaaaaaaaaaaaaaaaaaaaaaaaaaaaaaaaaaaaaaaaaaaaaaaaaaaaaaaaaaaaaaaaaaaaaaaaaaaaaaaaaaaaaaaaaaaaaaaaaaaaaaaaaaaaaaaaaaaaaaaaaaaaaaaaaaaaaaaaaaaaaaaaaaaaaaaaaaaaaaaaaaaaaaaaaaaaaaaaaaaaaaaaaaaaaaaaaaaaaaaaaaaaaaaaaaaaaaaaaaaaaaaaaaaaaaaaaaaaaaaaaaaaaaaaaaaaaaaaaaaaaaaaaaaaaaaaaaaaaaaaaaaaaaaaaaaaaaaaaaaaaaaaaaaaaaaaaaaaaaaaa" , 1100 ) == -1 ) { printf ("Failed\n" ); return 0 ; } printf ("\nRead from device..." ); if (read(fd, buf, 1024 ) > 0 ) { buf[1023 ] = '\0' ; printf ("%s\n" , buf); } else { printf ("Failed\n" ); return 0 ; } printf ("\nClear device..." ); if (ioctl(fd, RW_CLEAR) == 0 ) printf ("Successful\n" ); else { printf ("Failed\n" ); return 0 ; } ret = close(fd); printf ("Device closed\n" ); return 0 ; }
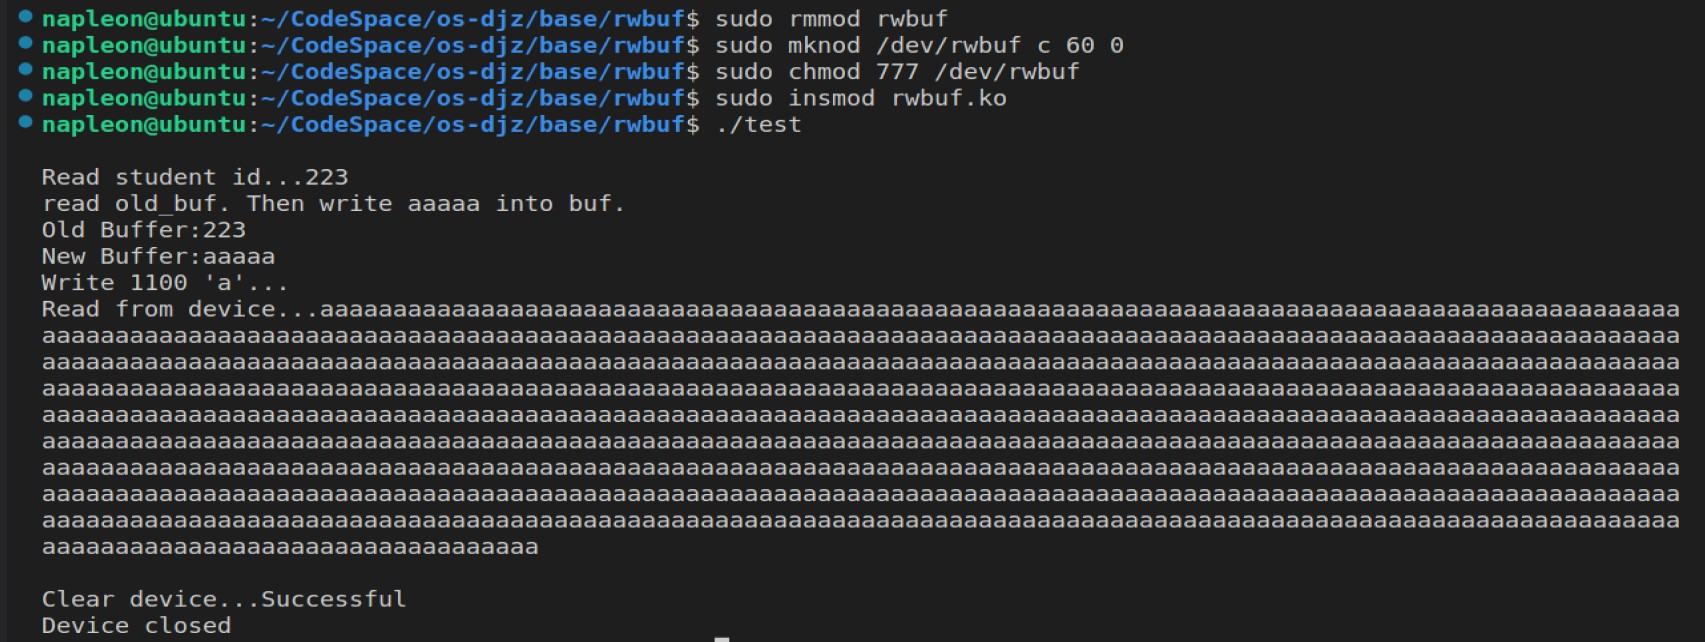
编译并执行设备驱动,结果如下图。
测试结果:
最后记得卸载设备
中级题目 Shell编程 编写一个脚本,能够生成完成基础题目(即:“编写shell脚本,该脚本接收两个参数,参数1作为要读写的文件,参数2作为标志位,标识是读还是写。功能完成对参数1所示文件的读写,该文件的内容为 “自己学号的后3位 MYFILE”。“)的脚本,并且自动执行该生成的脚本(执行功能:写入文件)。
写一个脚本,将基础题目的脚本作为内容写进文件里,然后自动执行生成的文件即可。
1 2 3 4 5 6 7 8 9 10 11 12 13 14 15 16 17 18 19 20 21 22 23 24 25 26 27 28 29 30 31 32 33 34 35 36 37 38 39 40 #!/bin/bash # Set the filename and flag variables filename="$1" flag="$2" # Generate the script content script_content=$(cat <<'EOF' #!/bin/bash filename="$1" flag="$2" if [ "$flag" = "0" ]; then # Read file content content=$(cat "$filename" ) echo "文件内容:$content" elif [ "$flag" = "1" ]; then # Get the last three digits of the student ID student_id="21069100223" last_three_digits="${student_id: -3}" # Write to the file echo "$last_three_digits MYFILE" > "$filename" echo "已成功写入文件:$filename" else echo "无效的标志位!请使用0(读)或1(写)作为第二个参数。" fi EOF ) # Write the script content to a file script_filename="rw.sh" echo "$script_content" > "$script_filename" echo "Generated script: $script_filename" # Make the generated script executable chmod +x "$script_filename" # Execute the generated script with the provided arguments ./"$script_filename" "$filename" "$flag"
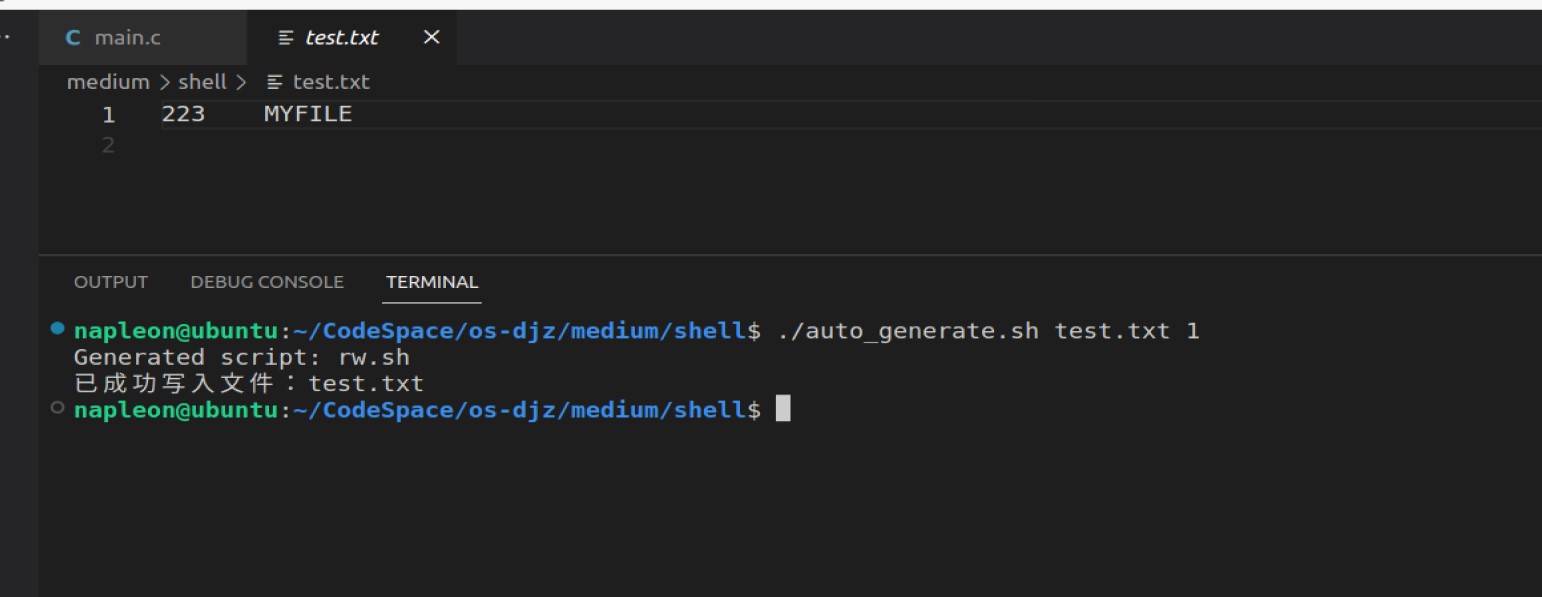
测试结果:
系统调用编程 对于基础题目系统调用编程中的第2题(即:使用semaphore,并利用该程序生成2个进程(注意:非线程),这两个进程写同一个文件,要求:a.互斥写,即只有一个进程写完后,才能让另一个进程写; b. 一个进程写入内容:“自己学号的后3位PROC1 MYFILE1”;另一个进程写入内容:“自己学号的后3位PROC2 MYFILE2”),将该程序的semaphore替换成使用strict alternation算法的忙等待互斥锁完成。
严格轮换法参考课本。我申请了一块共享内存作为lock,对于父子进程均可见。注意,write具有原子性,我身边有很多人使用一个全局变量作为lock,但是write时直接将一句话写进文件里,这样结果看起来是对的,实际上并没有实现互斥。因为fork()出的子进程是父进程的一个副本,二者的地址空间不同,所以lock不是共享的,实现父子进程之间的通信的方法有很多,可以参考我的另外一篇 博客 。
1 2 3 4 5 6 7 8 9 10 11 12 13 14 15 16 17 18 19 20 21 22 23 24 25 26 27 28 29 30 31 32 33 34 35 36 37 38 39 40 41 42 43 44 45 46 47 48 49 50 51 52 53 54 55 56 57 58 59 60 61 62 63 64 65 66 67 68 69 70 71 72 73 74 75 76 77 78 79 80 81 #include <stdio.h> #include <string.h> #include <pthread.h> #include <semaphore.h> #include <syscall.h> #include <fcntl.h> #include <unistd.h> #include <sys/ipc.h> #include <sys/shm.h> #define MAX_SIZE 1024 int fd; int * shm_addr;void print1 () { while (shm_addr[0 ] == 0 ); char * content = "223PROC1 MYFILE1\n" ; for (int i = 0 ; i < 19 ; i++) { write(fd, content + i, 1 ); } shm_addr[0 ] = 0 ; } void print2 () { while (shm_addr[0 ] == 1 ); char * content = "223PROC2 MYFILE1\n" ; for (int i = 0 ; i < 19 ; i++) { write(fd, content + i, 1 ); } shm_addr[0 ] = 1 ; } int main (int argc, char * argv[]) { int shmid; key_t key; char * filename = argv[1 ]; char * mode = argv[2 ]; key = ftok("./" , 2023 ); if (key == -1 ) { perror("ftok" ); } shmid = shmget(key, MAX_SIZE, IPC_CREAT | 0666 ); if (shmid < 0 ) { perror("shmget" ); exit (-1 ); } shm_addr = shmat(shmid, NULL , 0 ); shm_addr[0 ] = 0 ; if ((fd = open(filename, O_RDONLY)) == -1 ) { fprintf (stderr , "fail to open %s\n" , filename); exit (2 ); } if (strcmp (mode, "0" ) == 0 ) { char buf[MAX_SIZE]; read(fd, buf, MAX_SIZE - 1 ); printf ("%s" , buf); } else if (strcmp (mode, "1" ) == 0 ) { pid_t pid = fork(); if (pid == 0 ) { print2(); } else { print1(); } } else { fprintf (stderr , "usage: 0:read, 1:write.\n" ); } close(fd); exit (0 ); }
编译的命令:
1 gcc read_write.c -o read_write -lpthread
测试结果:
内核编程
对于基础题目中的内核编程题(即: 添加一个系统调用, 该系统调用接受两个参数:参数1:以整型数表示的自己学号的后3位;参数2:flag,取值为0或1,若为0,该系统调用的返回值为参数1的个位。若为1。该系统调用的返回值为参数1的十位),进行修改,修改如下:
声明一个内核全局变量gOSE, 该系统首先将参数1的值赋给gOSE,并且,对于参数2:flag,取值为0或1,若为0,将gOSE的值按位取反,后赋值给gOSE,然后返回gOSE的值;若为1,则将gOSE的值与0Xffffffff异或,后赋值给gOSE,然后返回gOSE的值;
加入内核互斥锁,使得两个进程在调用该系统调用时,能够做到互斥访问gOSE。
对于中级题目中系统调用编程的第1题,给出strict alternation算法中turn变量的虚地址,并且给出该变量的物理地址。
驱动编程 对基础题目中的驱动编程进行修改增加mmap接口,使其能够通过mmap读写rwbuf中的内容。
1 2 3 4 5 6 7 8 9 10 11 12 13 14 15 16 17 18 19 20 21 22 23 24 25 26 27 28 29 30 31 32 33 34 35 36 37 38 39 40 41 42 43 44 45 46 47 48 49 50 51 52 53 54 55 56 57 58 59 60 61 62 63 64 65 66 67 68 69 70 71 72 73 74 75 76 77 78 79 80 81 82 83 84 85 86 87 88 89 90 91 92 93 94 95 96 97 98 99 100 101 102 103 104 105 106 107 108 109 110 111 112 113 114 115 116 117 118 119 120 121 122 123 124 125 126 127 128 129 130 131 132 133 134 135 136 137 138 139 140 141 142 143 144 145 146 147 148 149 150 151 152 153 154 155 156 157 158 159 160 161 162 163 164 165 166 167 168 169 170 171 172 173 174 175 176 177 178 #include <linux/module.h> #include <linux/kernel.h> #include <linux/fs.h> #include <linux/uaccess.h> #include <linux/mm.h> #include <linux/slab.h> #include <asm/io.h> #include <linux/gfp.h> #define RW_CLEAR 0x909090 #define RW_RDOLD 0x909091 #define RW_RDNEW 0x909092 #define DEVICE_NAME "rwbuf" static int inuse = 0 ;#define RWBUF_MAX_SIZE 1024 static int mode = 1 ;static char * rwbuf_old;static int old_cnt = 3 ;static char * rwbuf_new;static int new_cnt = 3 ;int rwbuf_open (struct inode *inode, struct file *file) { if (inuse == 0 ) { inuse = 1 ; try_module_get(THIS_MODULE); return 0 ; } else return -1 ; } int rwbuf_release (struct inode *inode, struct file *file) { inuse = 0 ; module_put(THIS_MODULE); return 0 ; } ssize_t rwbuf_write (struct file *file, const char *buf, size_t count, loff_t *f_pos) { if (count > 0 ) { strcpy (rwbuf_old, rwbuf_new); old_cnt = new_cnt; new_cnt = count > RWBUF_MAX_SIZE ? RWBUF_MAX_SIZE : count; copy_from_user(rwbuf_new, buf, new_cnt); printk("[rwbuf] Write successful. After writing, new_cnt = %d\n" , new_cnt); return new_cnt; } else { printk("[rwbuf] Write failed. Length of string to be written = %lu\n" , count); return -1 ; } } ssize_t rwbuf_read (struct file *file, char *buf, size_t count, loff_t *f_pos) { if (mode == 1 ) { copy_to_user(buf, rwbuf_new, count); } else { copy_to_user(buf, rwbuf_old, count); } return count; } long rwbuf_ioctl (struct file *file, unsigned int cmd, unsigned long arg) { printk("[rwbuf] [RW_CLEAR:%x],[cmd:%x]\n" , RW_CLEAR, cmd); if (cmd == RW_CLEAR) { new_cnt = 0 ; printk("[rwbuf] Do ioctl successful. After doing ioctl, new_cnt = %d\n" , new_cnt); } else if (cmd == RW_RDNEW) { mode = 1 ; } else if (cmd == RW_RDOLD) { mode = 0 ; } else { printk("[rwbuf] Do ioctl failed. new_cnt = %d\n" , new_cnt); return -1 ; } return 0 ; } int rwbuf_mmap (struct file *file, struct vm_area_struct *vma) { unsigned long offset = vma->vm_pgoff << PAGE_SHIFT; unsigned long pfn_start = (virt_to_phys(rwbuf_new) >> PAGE_SHIFT) + vma->vm_pgoff; unsigned long virt_start = (unsigned long )rwbuf_new + offset; unsigned long size = vma->vm_end - vma->vm_start; if (remap_pfn_range(vma, vma->vm_start, pfn_start, size, vma->vm_page_prot )) return -EAGAIN; return 0 ; } static struct file_operations rwbuf_fops = { open : rwbuf_open, release : rwbuf_release, read : rwbuf_read, write : rwbuf_write, unlocked_ioctl : rwbuf_ioctl, mmap : rwbuf_mmap, }; static int __init rwbuf_init (void ) { int ret = -1 ; rwbuf_new = kzalloc(RWBUF_MAX_SIZE, GFP_KERNEL); strcpy (rwbuf_new, "223\0" ); rwbuf_old = kzalloc(RWBUF_MAX_SIZE, GFP_KERNEL); strcpy (rwbuf_old, "223\0" ); printk("[rwbuf] Initializing device...\n" ); ret = register_chrdev(60 , DEVICE_NAME, &rwbuf_fops); if (ret != -1 ) printk("[rwbuf] Initialize successful\n" ); else printk("[rwbuf] Initialize failed\n" ); return ret; } static void __exit rwbuf_exit (void ) { unregister_chrdev(60 , DEVICE_NAME); printk("[rwbuf] Uninstall successful\n" ); } module_init(rwbuf_init); module_exit(rwbuf_exit); MODULE_LICENSE("GPL" );
测试代码:
1 2 3 4 5 6 7 8 9 10 11 12 13 14 15 16 17 18 19 20 21 22 23 24 25 26 27 28 29 30 31 32 33 34 35 36 37 38 39 40 41 42 43 44 45 46 47 48 49 50 51 #include <stdio.h> #include <fcntl.h> #include <sys/mman.h> #include <unistd.h> #define DEVICE_PATH "/dev/rwbuf" #define MAP_SIZE 1024 int main () { int fd; char *mapped_addr; fd = open(DEVICE_PATH, O_RDWR); if (fd == -1 ) { perror("Failed to open device" ); return -1 ; } mapped_addr = mmap(0 , MAP_SIZE, PROT_READ | PROT_WRITE, MAP_SHARED, fd, 0 ); if (mapped_addr == MAP_FAILED) { perror("Failed to mmap" ); close(fd); return -1 ; } printf ("hello\n" ); printf ("Device Data: %s\n" , mapped_addr); if (munmap(mapped_addr, MAP_SIZE) == -1 ) { perror("Failed to unmap" ); close(fd); return -1 ; } close(fd); return 0 ; }
测试结果:
高级题目 制作启动盘(选做)
使用麒麟桌面操作系统内核(只能使用麒麟桌面操作系统内核),在不重新编译内核的情况下,制作USB启动盘,使得计算机从USB盘上启动,加载initial ramdisk,并能够自动运行一个shell脚本,该shell 脚本在中端上输出自己学号的后·3位。
对上题的USB启动盘进行修改(注意,无论何种修改,只能使用麒麟桌面操作系统内核),并不能重新编译内核),能够将USB启动盘作为根目录进行挂载,并且从USB盘上启动后,能够自动运行一个shell脚本,该shell 脚本在将自己学号的后·3位写入USB启动盘上的一个文件中。
系统调用编程(必做) 编写一个程序,并利用该程序生成2个进程(注意,非线程),这两个进程写同一个文件,要求:
a.互斥写,即只有一个进程写完后,才能让另一个进程写; 该互斥实现使用忙等待锁完成互斥。该忙等待锁在x86平台上必须使用xchg和cmp汇编语句完成,如果在arm平台上,必须使用ldrex和strex 和cmp完成,并且,对于锁变量lock,lock为1时表示锁被释放,lock为0时表示上锁。
b. 一个进程写入内容:“自己学号的后3位PROC1 MYFILE1”;另一个进程写入内容:“自己学号的后3位PROC2 MYFILE2”
1 2 3 4 5 6 7 8 9 10 11 12 13 14 15 16 17 18 19 20 21 22 23 24 25 26 27 28 29 30 31 32 33 34 35 36 37 38 39 40 41 42 43 44 45 46 47 48 49 50 51 52 53 54 55 56 57 58 59 60 61 62 63 64 65 66 67 68 69 70 71 72 73 74 75 76 77 78 79 80 81 82 83 84 85 86 87 88 #include <stdio.h> #include <stdlib.h> #include <string.h> #include <unistd.h> #include <sys/types.h> #include <sys/stat.h> #include <fcntl.h> #include <sys/ipc.h> #include <sys/shm.h> #define BUFSZ 8 #define LOCK_BUSY 0 #define LOCK_FREE 1 volatile int * lock;void lock_acquire (volatile int *lock) { int tmp = LOCK_BUSY; asm volatile ("xchg %0, %1" : "=r" (tmp) : "m" (*lock), "0" (tmp) : "memory" ) ; while (tmp == LOCK_BUSY) { asm volatile ("pause" :::"memory" ) ; tmp = *lock; asm volatile ("xchg %0, %1" : "=r" (tmp) : "m" (*lock), "0" (tmp) : "memory" ) ; } } void lock_release (volatile int *lock) { asm volatile ("movl %1, %0" : "+m" (*lock) : "r" (LOCK_FREE) : "memory" ) ;} void write_proc (char * fname, char * msg) { lock_acquire(lock); int fd = open(fname, O_CREAT|O_WRONLY|O_APPEND, 0666 ); if (fd < 0 ){ perror("open failed" ); exit (1 ); } for (int i = 0 ; i < strlen (msg); i++) { write(fd, msg+i, 1 ); } close(fd); lock_release(lock); } int main (void ) { int shmid; key_t key; key = ftok("./" , 2015 ); if (key == -1 ) { perror("ftok" ); } shmid = shmget(key, BUFSZ, IPC_CREAT | 0666 ); if (shmid < 0 ) { perror("shmget" ); exit (-1 ); } lock = shmat(shmid, NULL , 0 ); *lock = LOCK_FREE; int pid = fork(); char fname[] = "./test.txt" ; char msg1[128 ], msg2[128 ]; sprintf (msg1, "223PROC1 MYFILE1\n" ); sprintf (msg2, "223PROC2 MYFILE2\n" ); if ((pid) < 0 ){ perror("fork failed" ); exit (1 ); } else if (pid == 0 ){ write_proc(fname, msg1); } else { write_proc(fname, msg2); } return 0 ; }
驱动编程(选做)
安装Qemu虚机,注:在线资料中“已安装Qemu的虚机”中解压后是一个vmware虚机,这里称其为VW虚机。VW虚机里面已经安装好Qemu,并且也安装了一个Qemu 虚机,这里称其为QVM,QVM自身并不携带gcc,仅作为示例。VWroot密码是1,QVM的root密码是0;同学可在QVM基础上补完gcc等编程环境,或重新装一个完整的QVM。
对于给出edu设备(它是Qemu虚拟化出的一个设备)的驱动,请对其进行改进,使其能够完成DMA数据传输;并且编写相关的用户态下测试程序进行证明。
搭建环境
老师将已安装的虚拟机分卷压缩上传在了课程资料中,将其下载至同一文件夹下。
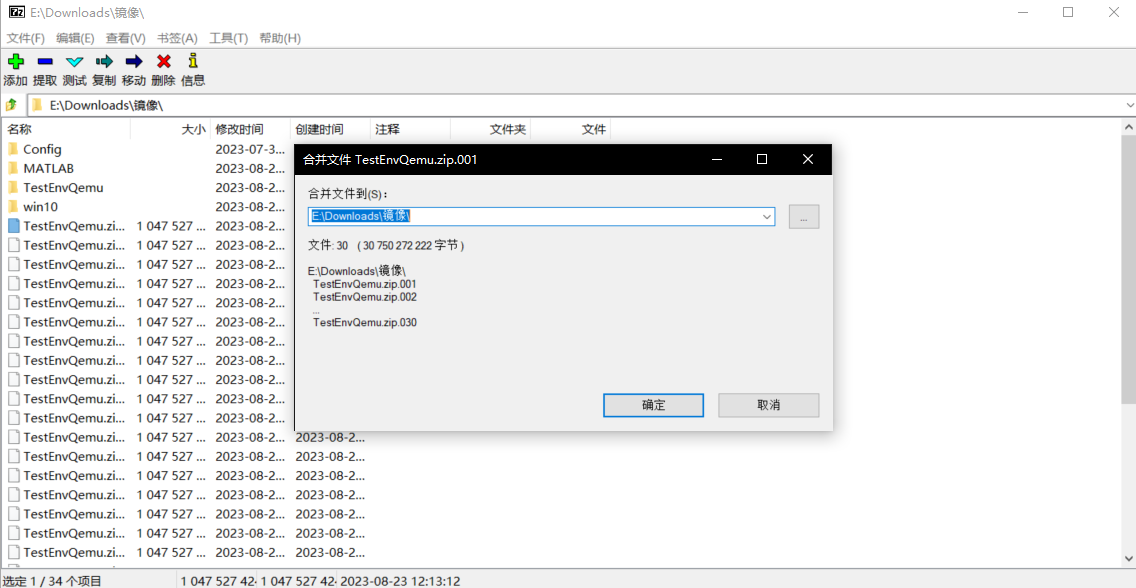
使用7zip,打开下载路径,选中其中一个分卷压缩文件,点击左上方“文件”选项点击合并文件。
7zip会自动检测出所有分卷压缩文件,选择导出路径导出合并压缩文件。
使用VMstation创建新的虚拟机时依次点击
自定义
默认
稍后安装操作系统
Linux->Ubuntu
自定义虚拟机名称与路径
自定义处理器数量
自定义内存大小
默认网络类型
默认IO类型
默认磁盘类型
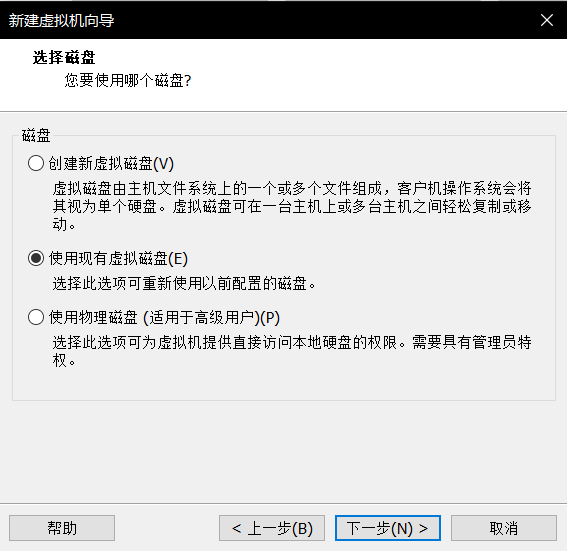
使用现有虚拟磁盘
选择使用现有的虚拟磁盘。
保持现有格式
选择TestEnvQemu.vmdk文件。
至此,学校提供的测试环境搭建完毕。
编写edu设备 打开虚拟机后,首先下载一个Markdown阅读器
1 root@testenvqemu:/home/testenvqemu
内核编程(选做) 添加系统调用,根据传入的标志位,通过轮询方式、或DMA方式读取上述edu设备驱动程序的结果


